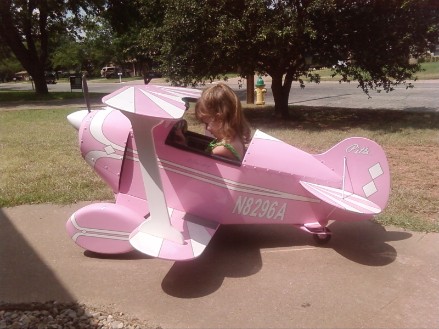
I discovered these airplanes back in 2006. I also had just had a daughter so I had a good excuse to build one. Of all the designs available, I chose the Pitts because I thought I could make it look the most scale and it would be the plane I could make the most girly. Being the fist plane, I just used standard 3/8" plywood from the lumber yard. I wanted a perfectly smooth finish so I did a lot of sanding and coated the wood with r/c model finishing resin. I didn't like the looks of the football cut in half for a spinner, so I made a wooden one and added a 22" r/c airplane propeller. It turns freely on a shaft. Not until the second Pitts that I built did I modify the airplane to use a system like the P-51 does to turn the prop. I also didn't like the looks of the instrument panel sticker, so I made a panel of 3/32" plywood and cut up the instrument panel sticker to fit the new locations for the instruments. I also added toggle switches, a light, and 4 way switch to give it a more realistic look. I used a panel marking kit from Aircraft Spruce and Specialty to label the panel. The red push button activates an r/c sound device of a light aircraft engine. It was purchased from RAM r/c products. The lights and sound are run by two 9 volt batteries behind the panel. The airplane was painted with Nelson Hobby Paint. The Pitts logo was made by Callie Graphics. The N-numbers came from Graphics by Greg. I also added struts to the horizontal stabilizers on the tail. I've seen a few pictures of where the stabs have been broken off. A kid wouldn't think twice about stepping or sitting on them. The struts add a lot of strengh back there and give you a conveinient place to grab when you are moving the plane.
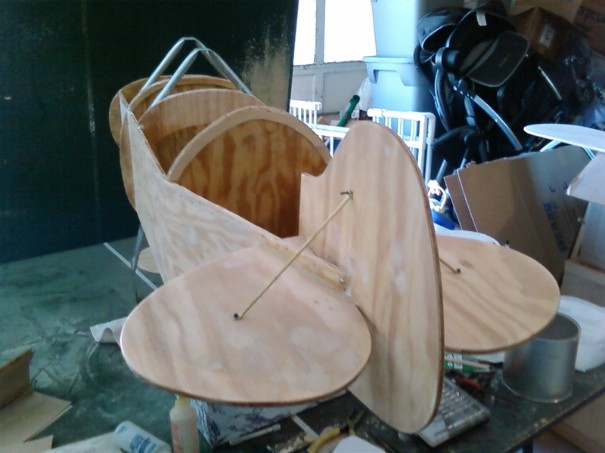
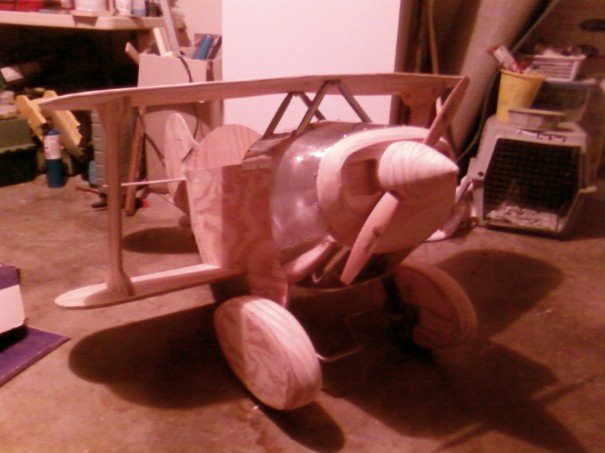
Pitts fuselage with cabane struts and tail struts attached. Tail struts are not on plans, but I recommend them to add strength. I've seen several with the horizontal stabilizers snapped off.
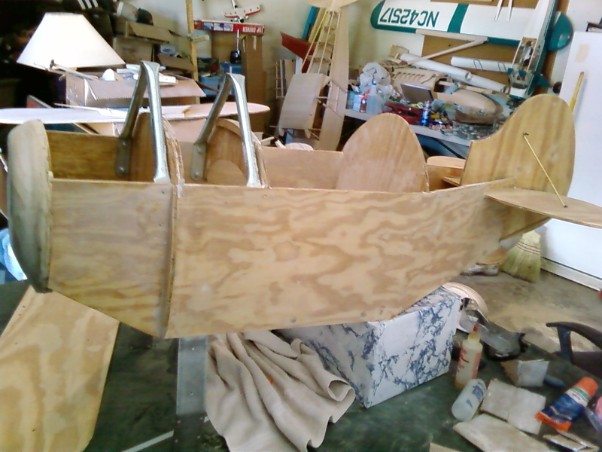
Another view of the basic fuselage structure.
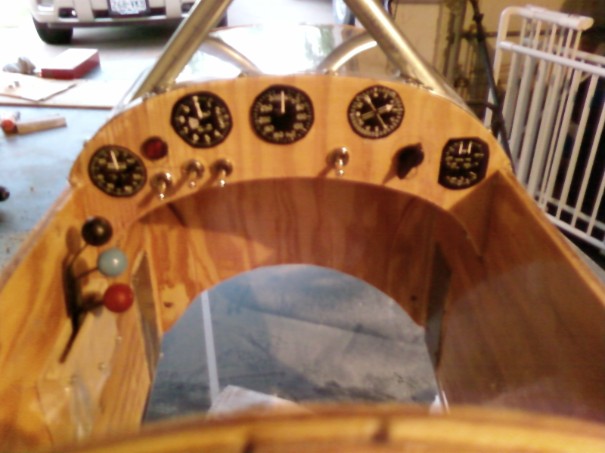
Crude layout of the instrument panel. I cut up the sticker provided and moved them around. I added switches and light to make it more interesting. On the side is a throttle quadrant I built for it too. I later remade it so that it looked much better. When all finished, it velcroed to the side so it could be removed it if got in the way of the rider.
Pretty much complete plane ready for primer and paint.
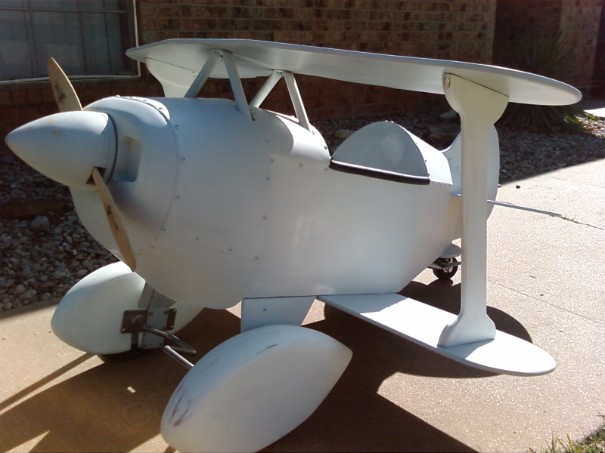
Almost finished priming.
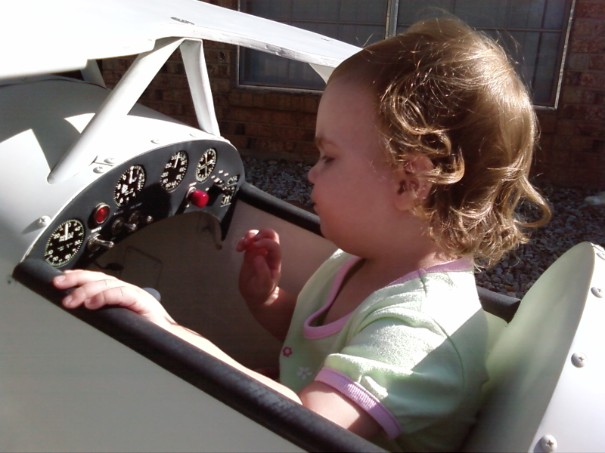
My daughter trying out the primed Pittls with the almost finished instrument panel.
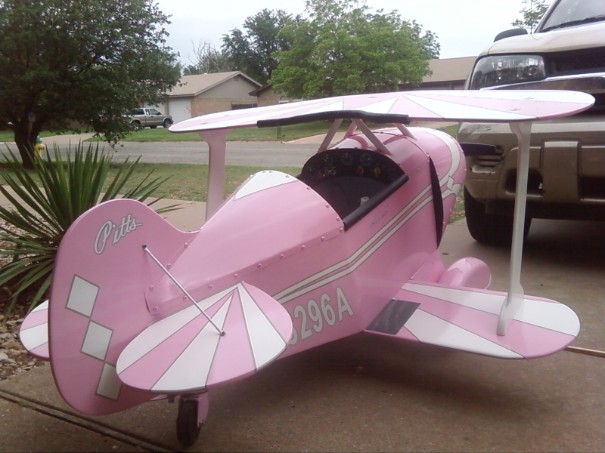
The finished aircraft. The paint was mixed by Nelson Hobbies. I thought the Pitts would be the better design to paint pink for a little girl.
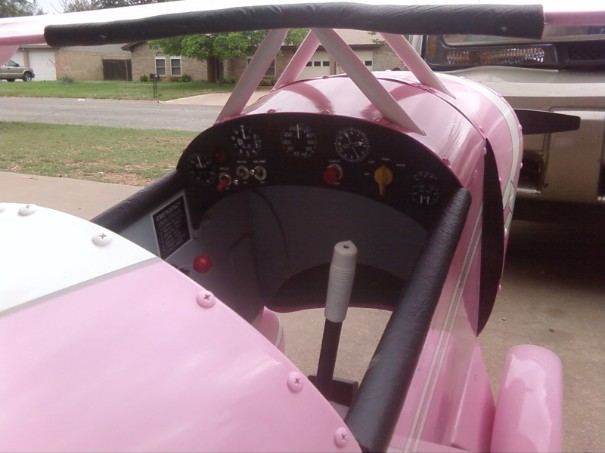
The finished instrument panel. The placards came from Aircraft Spruce and Specialties.
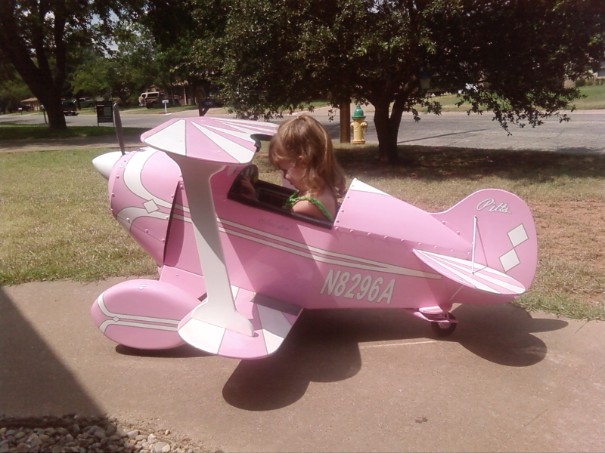
My daughter playing in her pink Pedal Pitts.